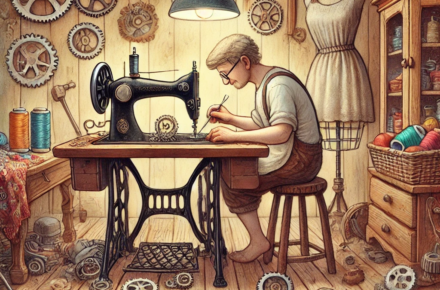
Discover the Joy of Japanese Embroidery Machines: A Beginner’s Fun Guide
Hello! I’m Jiminy!
Today, let’s dive into the world of embroidery machines together! Are you thinking, “Hmm, embroidery seems difficult…”? Honestly, I felt the same way at first. But once I started using it… wow, it’s so much fun! So, let me share the charm of embroidery machines with a few laughs (?) and tips along the way!
Table of Contents
- Basics and Types of Embroidery Machines
- Essential Tools and How to Choose Materials for Embroidery
- Basic Operations and Settings of an Embroidery Machine
- Creating Embroidery Designs and Utilizing Software
- Troubleshooting
- Maintenance and Tips to Extend Machine Life
- Examples of Embroidery Applications
- Estimated Time Required for Embroidery
1. Basics and Types of Embroidery Machines
Let’s start with the basics of embroidery machines! “What exactly is an embroidery machine?”—we’ll cover that first.
Home Embroidery Machines
Home embroidery machines are perfect for beginners. What’s amazing is that they automatically thread the needle and cut the thread with just a button! At first, I was like, “Wait, this is so high-tech?” But once I started using it, I thought, “Hey, I can actually do this!” The one I use is the Janome IJ521. It pairs perfectly with Jiminy Stitch, working smoothly together to make embroidery a breeze. If you’re just starting out, I highly recommend it!
Industrial Embroidery Machines
On the other hand, industrial embroidery machines are great for professional-grade designs and detailed stitches. Plus, they’re faster than home machines. If you’re aiming for time efficiency, go with an industrial machine. When I saw a video of one in action, I was like, “Do humans really operate these?”—it’s that high-spec. It’s amazing, but a bit intimidating. One day, I hope to master one…
2. Essential Tools and How to Choose Materials for Embroidery
It’s not just the embroidery machine that’s important—tools and materials matter too. If you get the right ones, your creative energy will definitely soar!
Embroidery Thread
I recommend shiny polyester or rayon embroidery thread. There are so many options that choosing colors might take some time… but that’s part of the fun! You’ll find yourself saying, “Oh, this color is cute!” or “Wait, this one’s great too!” and time just flies by.
However, the more colors you choose, the more thread changes you’ll need to do, which can be quite the task! I usually use around 10 to 12 colors for my designs, but it’s easiest to stick with 2 to 6 colors. Simplifying the color palette makes the process easier, but choosing which colors to cut can be challenging.
Fabric
My go-to fabric is felt. It makes embroidery super smooth. If you add a patch to a child’s hat at preschool, they’ll likely say, “Wow, thank you!” and be super happy. Felt is easy to cut and perfect for beginners.
There are also many other fabrics you can experiment with:
- Cotton: Easy to handle for beginners and great for everyday items.
- Linen: Has a natural texture, perfect for making stylish items! Embroidery thread looks stunning on it, making designs stand out.
- Denim: A thick, sturdy material, ideal for casual items like bags or pouches. However, its thickness requires a more powerful embroidery machine!
The fabric you choose dramatically affects the final look, so find the one that suits your style!
3. Basic Operations and Settings of an Embroidery Machine
Before using an embroidery machine, let’s go over the basic operations!
Setting the Embroidery Hoop
The key is to stretch the fabric tightly in the embroidery hoop! You want it to be taut—”Nice and tight!”—so the design doesn’t warp. I’ve had moments where I didn’t stretch it enough, and… let’s just say it wasn’t a pretty sight (haha).
Thread Setup and Adjustment
Make sure the upper and lower threads are properly set up, and always check the thread tension! If you notice it’s tangled or not stitching smoothly, pause, take a breath, and check the tension. Don’t forget to do a test stitch!
4. Creating Embroidery Designs and Utilizing Software
Now for the real fun—creating original designs with your embroidery machine!
Design Creation Basics
To create embroidery designs, you’ll need specialized software. “Whoa, that sounds complicated…”—but don’t worry! There are beginner-friendly free software options and professional-grade paid ones. Choose one that suits your needs.
Introducing Jiminy Stitch
I use a tool called Jiminy Stitch, and it’s like magic! You can upload an image, and it converts it into a JEF format file for the embroidery machine. Then, you simply transfer the data via USB, and the machine takes care of the rest! You can create original designs in no time. That moment when the machine starts stitching is always thrilling, and the finished product is like, “Wow, this is amazing!”
[Jiminy Stitch Link]
5. Troubleshooting
Sometimes things don’t go as planned with your embroidery machine, but stay calm and you can solve most issues!
Thread Tangling or Breaking
It’s pretty common for threads to tangle or break. First, check the thread tension—if the upper thread tension is too loose or too tight, that could be the cause. Adjusting the upper thread tension often fixes the problem.
If you keep encountering issues, here’s a bit of a trick I use—I secretly spray a little silicone spray from Daiso on the thread. It smooths things out surprisingly well, so it’s worth a try!
Embroidery Placement Misalignment
Have you ever finished an embroidery and thought, “Wait, that’s in the wrong spot!”? In those cases, check the tightness of your fabric—it should be stretched firmly. If that doesn’t help, try using two layers of stabilizer to give it more support.
Another secret hack I sometimes use is masking tape. I tape the fabric to the hoop to keep it tight. And when things get really off-track, I even embroider directly on top of the tape! It’s an unconventional method, but it works at times!
6. Maintenance and Tips to Extend Machine Life
Taking care of your machine ensures it lasts a long time. After finishing your embroidery, make sure to clean out any thread remnants and add a bit of oil. Your machine will thank you!
7. Examples of Embroidery Applications
Once you’ve mastered the embroidery machine, you can create all kinds of fun items! Here are some of my favorite projects:
- Personalized Towels and Handkerchiefs: Make custom towels with names for birthday gifts, and everyone will love it! It’s always a surprise when you tell your friends, “I made this!”
- Bags and Pouches: Add original embroidery to simple bags or pouches for a one-of-a-kind item. You can create something truly unique!
8. Estimated Time Required for Embroidery
You might be wondering how long embroidery takes. For text embroidery, it doesn’t take too long. However, for designs with lots of stitches, especially characters, be cautious. For example, a design with around 15,000–20,000 stitches can take roughly about an hour.
When choosing an embroidery machine, check the machine’s specs, specifically its stitches per minute. This will give you an idea of how fast the machine can work. By the way, industrial machines are faster than home machines, so if you want to save time, I recommend going for an industrial one!
Once you get the hang of it, embroidery machines open up a whole world of fun projects! If you’re thinking, “Can I really do this?”—the answer is yes, you absolutely can! Next time, I’ll share more advanced design tips, so stay tuned!
コメント ( 0 )
トラックバックは利用できません。


この記事へのコメントはありません。